Prime
Catalog
Cart
All Games:
Tarkov | EFT Reserve Map Guide

Tarkov | EFT Reserve Map Guide

Welcome to the Tarkov Reserve Map Guide! From loot locations to extraction strategies, we’ve got you covered. Whether you’re a seasoned player or new to the game, this guide will help you navigate Reserve’s treacherous terrain and emerge victorious. Let’s dive in!

Tarkov Reserve Map Guide

Starting with the spawns on Reserve, players can find themselves scattered across various points on the map. From the field behind the train station to bunkers and buildings, the map offers diverse spawn locations, making it a congested but exciting battlefield. In the past, Reserve was primarily known for its sniping opportunities, but now, with underground sections and multiple levels, the dynamics have shifted, and players must navigate both above and below ground.

Cliff Descent Extract

Tarkov | EFT Reserve Map Guide

This is the Dome, a recognizable landmark also seen on the Shoreline map. Interestingly, you can use the Red Rebel extract here as well as on Shoreline. To access this extract, you’ll need the Red Rebel, obtainable through barter or purchase. Typically, it’s found on Shturman or in Shturman’s stash. Once you have the Red Rebel and meet the requirements (no body armor but allowed to wear an armored rig and backpack), head to the spot behind the Dome for a straightforward extraction.

Dome

Tarkov | EFT Reserve Map Guide

Inside the Dome, you’ll find some filing cabinets and weapon crates, although the loot used to be better in the past. Keep an eye out for the RLSA key, typically found on the third floor. The surrounding buildings house safes and more filing cabinets, making it beneficial to carry your keys in a Doc’s case or key tool. 

Safes often contain valuable items like GP coins, Bitcoins, and diaries. In the K building, there are two safes, an Intel spawn, and a weapon crate. While Intel spawns are less common now, they’re still worth noting. Additionally, you can use the vantage points to your advantage for scouting or sniping. Let’s continue our Tarkov Reserve Map Guide.

Hermetic Door Lever

Tarkov | EFT Reserve Map Guide

The Hermetic door lever is found inside this building. While we won’t flick it now, you can hear the audio cue, indicating that someone has activated it. Once you hear that noise, it means the lever has been flicked, and you can access the Hermetic extract.

Queen Building

Now, inside this building, there used to be high-value loot spawns, both on this side and throughout the servers at the back. However, the quality of loot has declined, making Reserve a middle-tier map in terms of loot potential. Nevertheless, it remains a hotspot for PvP encounters.

If you’re in dire need of medical supplies, you can find duffel bags upstairs in this room. In offline mode, loot spawns are still present, including medical bags and potential items hidden beneath the ground and floors. Moving through, be sure to check the shelves for spawns and keep an eye out for hidden spawns.

This building also contains filing cabinets and electronic spawns, with additional loot to be found on the upper floors, including more filing cabinets and toolboxes. Finally, there’s a way downstairs into the bunker, which we’ll demonstrate later in our Tarkov Reserve Map Guide.

White Bishop Building

Tarkov | EFT Reserve Map Guide

Moving over to the other side, we have the White Bishop building, also known as a medical facility. While there are weapon crates on the left-hand side as you enter, the primary reason for visiting this building is to find medical supplies or access the bunker below. Rooms resembling this layout typically contain medical spawns, particularly on the stretchers and tables at the back.

Heading upstairs, we encounter the SMP and KSM rooms. SMP offers more medical spawns along the shelves, essential for certain quests and thus making the key quite valuable. Similarly, KSM provides medical supplies and often spawns a duffel bag. While the roof used to be an excellent sniping spot, the return of tree leaves has diminished its effectiveness.

Nevertheless, there are still weapon crates available on the roof, along with additional medical spawns inside the building. It’s worth noting that players tend to cross the nearby field early in the raid, presenting an opportunity for quick kills if you’re swift enough.

Black Knight Building

Tarkov | EFT Reserve Map Guide

The next set of buildings are the Knight buildings, each requiring specific keys labeled as the RB-MP series (e.g., MP11, MP21, MP22, MP12). Inside these rooms, you’ll primarily find jackets and filing cabinets. On one side, there are two jackets, while the other side houses three. Graphics cards and more filing cabinets can also spawn here. Moving upstairs, you’ll encounter additional filing cabinets and toolboxes.

Depending on the room, you may come across valuable items like tank batteries or even fully modded AKs. However, these areas tend to attract a lot of player traffic, making them high-risk zones. Each room typically contains three computers, along with more filing cabinets. With a well-prepared loadout including an empty Doc’s case and key tool, looting these cabinets can yield substantial profits, even in the event of death.

It’s advisable to avoid using a pistol and backpack setup in this area, opting instead for a pistol and rig configuration. This allows for the utilization of the “no backpack” extract.

Sewer Manhole (No Backpack) Extract

The extract is right here, but watch out for players camping it for their Shoreline Heaven task. You have a few options for using it: you can stand on this side and wiggle to avoid canceling it by going too far left, or if you suspect no one’s in the dome, you can try the other side. Alternatively, you can go prone and crawl under it. Inside, there are two more filing cabinets, making it a filing cabinet heaven. There are also two jackets and another toolbox at the bottom of one of them.

Knight Storage Area

Moving on to RB-ST, previously a prime spot for tank batteries. Don’t worry about splurging on the key if it’s pricey; you’ll eventually get it from a Peacekeeper quest in the Wet Job series. Tank batteries used to spawn on these crates, alongside grenade cases and ammo. While offline mode offers lesser loot, you’ll still find grenade boxes and multiple weapon crates here. Transitioning to the other night building, head outside.

Glukhar Spawns

The boss for this map is Glukhar. He typically spawns in the train station area. However, in recent updates, his spawn points have become more varied. Now, he can appear not only in the train station but also in either of the two night buildings and even in the barracks on the far end of the map. Additionally, he may spawn underneath in the bunker, which we’ll show you later in Tarkov Reserve Map Guide.

White Knight Building

Inside this building, you’ll find three jackets and plenty of filing cabinets. Additionally, there are some locked rooms, which we believe require one of the MP keys to access. Inside, you may find valuable items like ACA spawns or weapon parts.

Be cautious when ascending to the upper floors, as players may attempt to snipe you from the surrounding area. Avoid falling down any holes, but feel free to vault over smaller gaps. These locked rooms typically contain more filing cabinets, jackets, toolboxes, or even fully modded weapons.

Entrances to Bunker

Tarkov | EFT Reserve Map Guide

To access the bunker, you have the option of using this doorway here, which leads to the cage room bunker. There are two entrances to consider—one here and another further down. Additionally, there’s an entrance on the other side of the red brick section.

Armored Train Extract

Tarkov | EFT Reserve Map Guide

Regarding the Rook building, the train extract occurs approximately around the 18-minute mark. The train arrives, allowing you to board, and departs about 7 to 10 minutes later. You’ll hear the train horn signaling its arrival and departure. Inside, you’ll find high weapon boxes, but be cautious as players may climb up onto the roof section from the back.

RB-VO Marked Room

The RB-VO marked room is located at one end of the building, while the RB-AO is situated at the other end. The RB-AO room contains weapon spawns and other valuable items, making it a decent spot to loot. You can obtain the key as a quest reward, although I don’t have it on me currently. Inside, you may find AKS-74U rifles, AK-74 rifles, and other weapon parts. The marked room can yield various valuable items such as dock cases, key tools, injector cases, dog tag cases, and ammo boxes. If you come across a marked key and intend to frequent this map, it’s advisable to keep it. Alternatively, you can sell it, as they currently fetch around 1.5 million rubles.

Trainyard

In this area of the map, when Glukhar spawns, he typically appears at either end or at the farthest end just beyond this side. There are a couple of ration supply crates here, although you can’t access them in offline mode for some reason. These crates contain two rations each.

There’s also a technical supply crate inside that section. Many people overlook these crates, but you don’t need keys to access them; you can simply loot them straight through the wall. There’s another Russian supply crate here, which used to require jumping over but no longer does.

Lastly, there’s a technical supply crate that can be accessed by vaulting up. If you’re on this side of the map, this is the easiest way to access them, and you can also vault out afterward.

Underground Warehouse

Now, heading downstairs to the bunker cage room, we encounter keys RB PSV 1 and 2, PSP 1 and 2. An image will appear on the screen to indicate which key corresponds to which cage. It’s advisable to acquire all four keys to ensure access.

Primarily, this section contains ration supply crates, with a technical crate and a medical crate nearby. You’ll find around five ration supplies in this area.

Hermetic Bunker Door Extract

This area is particularly lucrative for duo or trio teams, as you can efficiently loot while coordinating tasks. One member can hit the Hermetic door lever while others cover, allowing for extraction through the Hermetic door.

In these cages, you’ll find Technical Supply crates predominantly in one, a mix of items in another, and three Medical Supply crates plus one Technical Supply crate in the last. Despite the initial investment in keys, which typically cost around 400-500k with 40 uses, the return is substantial.

Working together, teams can efficiently loot all items, potentially making millions, especially early in the wipe when B trade items are more valuable. That covers everything on this side of the map. We should expect the train to arrive shortly.

Scav Lands (Co-Op) Extract

At the far end lies the scav co-op extract. As a PMC, you must collaborate with a scav. Simply approach the vehicle, identified as either a BTR or striker, and double-tap “o” to check if the extract is green. If it is, head over and team up with a scav for extraction. In terms of loot, this section of the map is mostly devoid of valuable items.

Black Bishop Building

Tarkov | EFT Reserve Map Guide

When it comes to the barracks buildings, Glukhar can spawn in this structure. On the other hand, he can spawn on any of the three floors, usually favoring the left-hand side. If you hear intense gunfire, it’s likely Glukhar with his six minions engaging in combat.

This building offers loot on every floor, although it’s not as lucrative as it once was. Graphics card spawns and Tetris spawns have become scarce. Technical spawns are still present, offering valuable items like medical military cables. On this floor, you’ll find Med spawns and Med boxes.

The ground floor doesn’t offer much except for RB, which contains graphics cards and other valuable items. RBA, accessible without a key, features computers and shelves with various loot. This room is also known as a drop-down room, allowing for easy escape. RB offers toolboxes, an Intel spawn, and used to be a hotspot for weapon parts and jacket spawns.

Black & White Pawn Buildings

Tarkov | EFT Reserve Map Guide

When it comes to these buildings, they are essentially mirrored, so we’ll show you one, but the layout is similar for both. Glukhar usually spawns on the second floor on the left-hand side. There are plenty of medical spawns here, ideal for finding items like Salewa and morphine. However, LEDX does not spawn on this map.

The cage rooms in these buildings, called “orb” rooms, contain valuable loot such as AK-74Us and AK-74Ns, along with weapon parts like 60-round magazines. Keep an eye out for unloaded ammo boxes, as they sometimes contain high-quality ammo like 995. Additionally, you’ll find filing cabinets and weapon boxes scattered throughout the buildings.

Inside the RB-OB room, which is needed for a quest, there used to be an Intel spawn and gold chains, although they have not been seen recently. The adjacent orb room contains AK spawns, filing cabinets, and valuable ammo. It’s worth noting that obtaining high-quality ammo outside of raids can be challenging, making these finds valuable.

There are two more orb rooms on this side, along with weapon crates spread throughout the building. Now, heading downstairs to the bunker section, we’ll show you the marked room. Inside the RB-TB room, you’ll find weapon parts and a weapon rack containing a fully modded AK spawn. Considering the modest cost of the key, it’s worth checking for this valuable loot.

RB-BK Marked Room

This is the RB-BK marked room. Inside, you can find valuable items like dock cases, key tools, ammo boxes, injectors, and dog tag cases.

Bunker

Tarkov | EFT Reserve Map Guide

Now, moving on to the bunker section, this is where things get intense. Scavengers who love this map often come here to scavenge dead players and hopefully encounter some Raiders. The supply crates here are divided into ration, technical, and medical categories.

In this room, listen for a scav or player voice line after flicking the lever; that signals the spawning of Raiders. It’s speculated that Raiders spawn if players are gathered in this room. Filing cabinets are abundant, along with some hidden weapon boxes. There are rare Intel spawns scattered around, worth a hefty sum.

When Raiders spawn, chaos ensues, as players converge from various directions. There are also quests that require exploration of this area. Moving to another section of the map, excellent for food task items, you’ll find multiple ration supply crates stacked together, ideal for completing tasks.

Heading downstairs, we pass by more technical and supply crates. Only loot these if you’ve cleared the area, as it’s easy to get caught out. On top of the helicopter box, there’s an Intel spawn, along with three weapon crates nearby. From the pawn building, we head towards the bottom, where the bunker lever is pressed, indicating the way to D2 extract (the next location of our Tarkov Reserve Map Guide).

D-2 Extract

Tarkov | EFT Reserve Map Guide

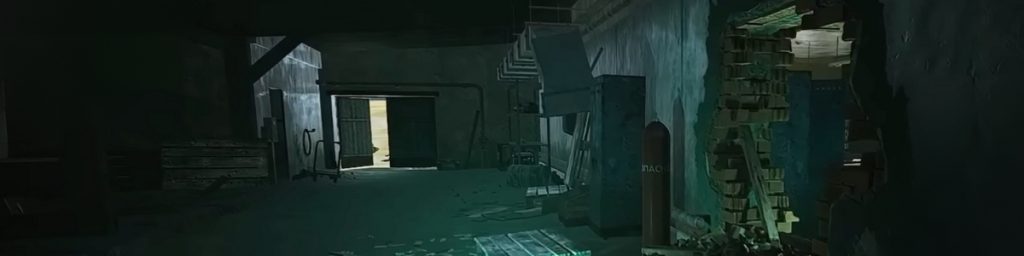
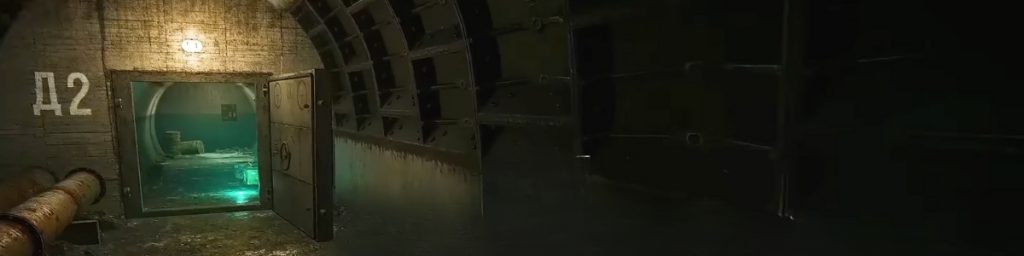
Now, let’s discuss D2. We would only consider using this extract as a last resort, perhaps if there are only five or ten minutes left in the raid and you’ve missed the train. There are players who camp this extract relentlessly, covering so many angles that it’s impossible to defend against them all. They might even wait for you to open the door and then instantly throw an impact grenade, leaving you with little chance to react.

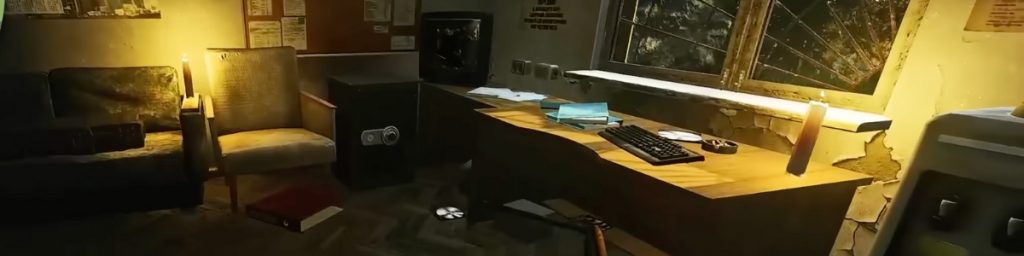
There are numerous ways they can ambush you down here, from wedging themselves behind doors to climbing up high or hiding in unexpected spots. It’s just not worth the risk unless you absolutely have to. Red Rebel is a worthwhile investment for Reserve mains. In terms of loot down here, you might find some valuable items like Vertexes, Aces, a safe in the back room, filing cabinets, and a computer.

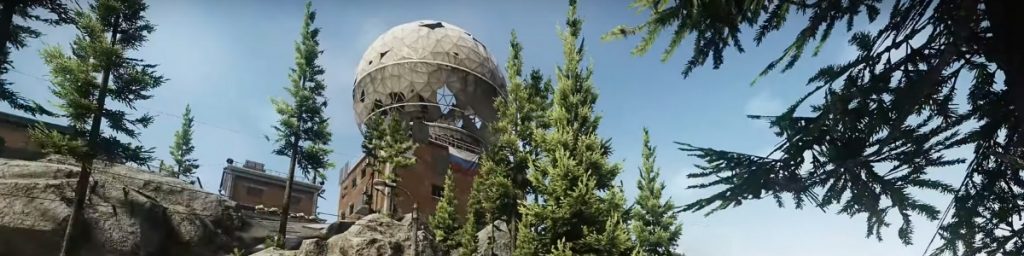
However, the side rooms don’t offer much loot, and it’s generally not worth the danger. If you follow the passageway up, it leads back to the Dome where we started, where you might find some weapon parts and other miscellaneous items.

The worst part is that there’s a way for campers to see through the walls, allowing them to gather information about your squad and gear before you even approach. Until this issue is patched, it’s best to avoid D2 altogether.

In terms of the extract itself, it’s loud and conspicuous, making it a risky option. In offline mode, it’s quiet, but in online raids, it’s loud and easily noticeable. Overall, it’s best to opt for other extraction points like the no backpack or Cliff descent via the Red Rebel, or simply wait for the train. Once the door opens, you can extract through here, concluding your Reserve adventure.

In conclusion, mastering the Reserve map in Escape from Tarkov requires careful planning, keen awareness, and tactical execution. Throughout this Tarkov Reserve Map Guide, we’ve explored the intricacies of Reserve, from its lucrative loot spawns to its perilous danger zones. By leveraging the insights and strategies provided here, you’ll be better equipped to navigate this unforgiving terrain, outsmart your opponents, and secure valuable resources. With dedication and our Tarkov Reserve Map Guide, you’ll conquer the challenges of Reserve and emerge as a true survivor. Good luck, and may your raids be bountiful!

All games mentioned on this website as well as all related terms, logos, and images are trademarks or registered trademarks of their respective publishers and owners. This site is in no way associated with or endorsed by any of the game publishers.


OR LOG IN WITH EMAIL

Login

Register

Your personal data will be used to simplify your work with the site, control access to your account and for other purposes described in our privacy policy.

Don’t have an account?
Register Now

Lost your password?