Tarkov | EFT Labs Map Guide
Welcome to the Tarkov Labs Map Guide! This guide provides essential insights into mastering the challenging Labs map in Escape from Tarkov. Learn navigation tactics, loot locations, extraction points, and survival strategies against Raiders and players. Whether you’re a seasoned veteran or new to Tarkov, this Tarkov Labs Map Guide equips you with the knowledge to thrive in Labs’ hostile environment. Let’s dive in and conquer this high-risk, high-reward battleground together!


Tarkov Labs Map Guide
First things first, to access Labs, you’ll need one of these access cards. You can find them in filing cabinets, purchase them from therapists, or even earn them through Scav runs as your reputation grows.
Now, let’s talk layout. Labs comprises three levels: Upper Floor, Bottom Floor, and Basement, accessible via ladders, staircases, and side entrances. Inside, you’ll find both colored key cards and regular keys, each granting access to different areas. Some keys are incredibly valuable, like the red key card, which can fetch millions but yields hefty profits per run. Keep in mind that offline mode may offer lesser loot, but Labs remains a lucrative option for making bank in Tarkov.
Hangar Gate Extract
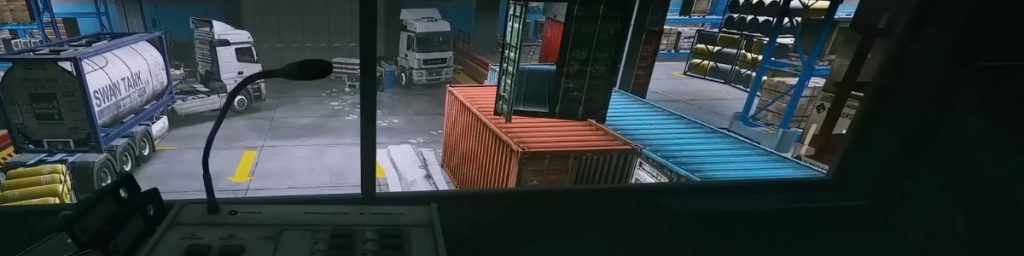
Let’s start off our Tarkov Labs Map Guide by exploring the central area, right here at the hangar gate. Pressing certain buttons here will open up extracts, but beware—Raiders often spawn in when you do, posing a greater threat than regular Scavs. Overexposing yourself to them can be devastating. Now, Labs is known for its abundant loot, thanks to its high loot multiplier. For example, searching a computer here could yield a graphics card in almost every raid.
Be cautious in the open middle area, as you’ll be vulnerable to both Raiders and other players, who can be quite aggressive in squads of up to five. Maneuvering around the back can be a safer option.
Heading down to the right through the hangar, you’ll find loose weapon parts and a LEDX spawn on top. There’s also a jacket, three computers, and a key spawn for the weapon testing key. Keep in mind that the server rack area doesn’t typically spawn anything. Let’s explore the map level by level to keep things organized.
Green Keycard Room

Alright, let’s not overlook this key area. Here, we have the green key card access panel, and currently, it’s considered one of the most valuable cards. It may even be pricier than the red one, mainly because the red card’s loot isn’t as lucrative at the moment. Inside, you’ll discover plenty of medical spawns along the edges, including stims. Keep an eye out for a black key card spawn next to the computer.
Moreover, there’s a chance to find LEDXs in this area, although they’re quite rare. You’ll spot a LEDX spawn in that container and stims on the nearby shelf. Also, don’t forget to check the shelves and the chair for potential gold spawns, which can include anything from keycards to Bitcoins and more valuable items like Pro kills.
Furthermore, you’ll find stims along the section and another gold spawn, as well as a LEDX and a graphics card spawn on the ground nearby. Keep an eye out for Intel spawns on the shelf and table as well.
Keycard With a Blue Marking Room

This area is essential for a quest, and you usually acquire this key by taking down Sanitar on Shoreline. There’s a staircase here that leads back downstairs to the lower level, where you can explore further. Now, there’s another extract located in this cargo elevator, also known as the cargo elevator extract. The button to activate it is down in the basement. Behind this area, there are a couple of rooms you can loot.
However, be sure to close the doors behind you if you choose to hide back here. If someone does come to this remote area and eliminates you, they’re likely cheating because it’s not a common loot spot. While there’s nothing overly remarkable to loot back here, there are a few stim and medical spawns around. People tend to check all the med spawns on the tables since a LEDX can technically spawn anywhere there’s a med spawn.
Stims can actually be quite valuable, so if you’re a Labs farmer, it’s wise to come in with an empty injector case. Many players opt to bring in a second empty injector case, perhaps with one injector at most, to maximize profits.
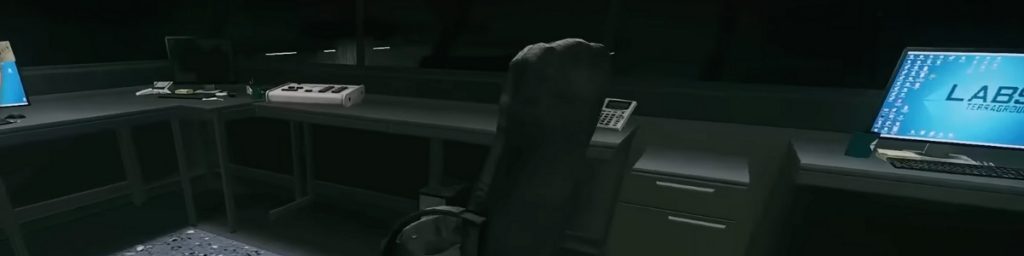
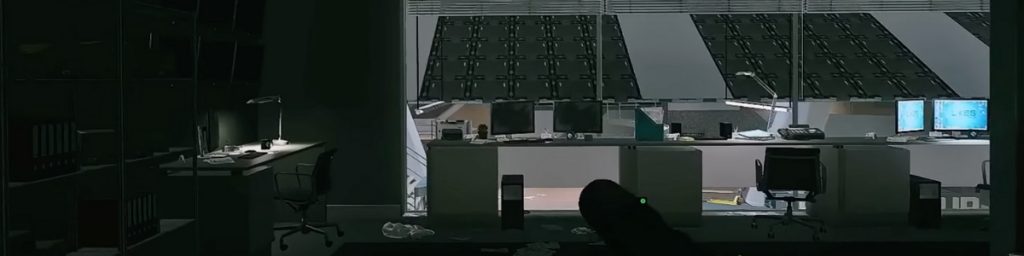
Dark Offices
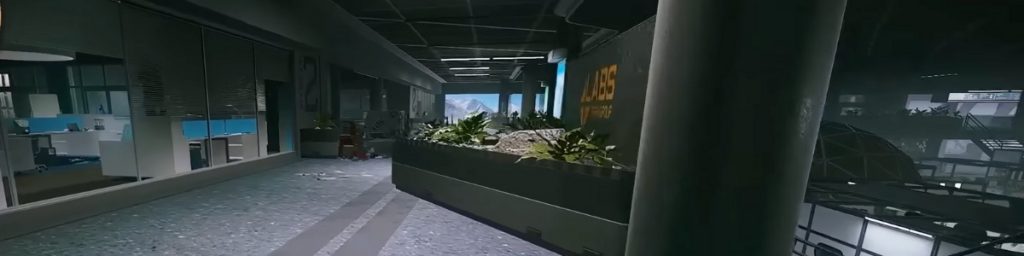
So, when you enter these rooms, your first task is to search all the computers. Each room is equipped with approximately ten computers, so you’ll have quite a few to go through. This spot right here is a common LEDX spawn, so keep an eye out for it. Moving on, there are four computers in this room. Additionally, there are gold spawns scattered around, so be thorough in checking both sides of the shelves and the ends.
Another noteworthy spot is the shelf, which also has gold spawns. Many people overlook these, so it’s worth a double-check. Don’t forget about the safe—it’s a prime target for looting. This is why it’s crucial to bring a docs case when exploring Labs; it allows you to store valuable items efficiently. Keep an ear out for the sound of glass breaking, as it often indicates players breaking into these office windows.
You’ll find more computer spawns along the front and back sides of these shelves, along with additional gold spawns. Over here, you might stumble upon a management office key spawn—while not as valuable as before, it’s still worth checking. Lastly, don’t overlook the filing cabinets; they can contain valuable items like Intel and SSDs that can also be stored in your docs case.
Yellow Keycard Room

As we continue in this direction, we come across the yellow keycard room. Inside, you’ll find gold spawns on the chairs. Upstairs, there’s a bit more loot to be found. Additionally, there’s a switch to disable the vocal announcement when opening the parking gate. This allows for a stealthier approach, as you can exit without alerting nearby players. While yellow keys may not be as valuable as before, they still yield decent gold spawns from time to time, making it worth a visit.
Parking Gate Extract
On this side, we’ve got gold spawns both here and on the chair, as well as at the top on both sides. This button opens the parking gate, but we’ve disabled the announcement, so now you can only hear the door opening without the verbal alerts. Also, if you double-tap “O,” you can see which gates have been opened.
Moving on, the cargo elevator hadn’t been opened, as indicated by the green light. In this room, we’ve got purple suitcases and a jacket, with the main loot being gold chains on the shelf, graphics cards on the floor, and gold spawns on the table. There are also four computers here to check for valuable items like graphics cards.
Along this side, you’ll find more gold spawns, badges, and Intel. Coming around this way, I need to show you where the green keycard spawns—right there. Make sure you check it, as it can be worth a significant amount. Lastly, although you can’t loot these crates in offline mode, during pistol backpack runs, you’ll often find armor in them, so they’re worth checking out.
Violet Keycard Room
Alright, the Violet keycard is probably going to increase in value after this video because, honestly, it’s pretty decent. You’ve got three spawns on that shelf alone, another on the floor, one more there, and another on the table. So, while we’re not saying you’ll make hundreds of thousands of rubles every raid, sometimes you’ll make 2 or 3, maybe even 400k each time you open this.
And don’t forget, there are also gold spawns in here as well, either on the floor or in the cabinetry. You’ve got three weapon crates and weapon parts that spawn on these shelves. So, it’s not like you’re going to hit the jackpot every raid with this room, but it does add up over time.
What we like to do, especially if we’re going solo, is let people kill each other off in the raid while we hide in the Violet room, looting it up and filling my Docs case with random stuff we find. And remember, you can always just run away if things get too hot.
Red Keycard Room
Now, onto the red keycard room. This one’s the most controversial because of how bad it is for how expensive it is. You used to find a lot of pimped-out M4s and full-stock M4s on the shelves, along with gold spawns. Everything pretty much here, besides RFID, has gold spawns. Loose ammo boxes spawn here too, and they’ve added good ammo to the loot table inside here.
You do need the actual key for it, the Armory or Arsenal storage room key. There are gold spawns up high, and the trick to reaching them is opening two at the same time, jumping, and crouching to get up there. Alternatively, you can sometimes glitch yourself up the wall a bit.
Moving on, there’s no real good loot in the backroom hallway at all, but be careful if you spawn up that end. People often hide in the bush or lay down on the ground, waiting for you to come out. The yellow keycard can spawn on top of here, so keep an eye out.
As for this section, there’s no loot on this floor, but be cautious of people coming up the staircase, as the audio can be misleading. Finally, this area is what we call ice cream or storage freezers, depending on your preference.
Manager’s Office
Alright, back at the starting point, we’re heading this way to show you the management office, completing this floor in its entirety. On the table here, you’ll find a green keycard spawn, along with an Intel spawn on the ground. Keep an eye out for the yellow keycard spawn on the table inside here; they’re rare but still present. Despite its diminished value, the green keycard can still yield some loot, so it’s worth checking.
After fully clearing Labs and ensuring no other players are around, you’ll find loot spawns on this table and underneath it. While rare, you might still encounter valuable items. Additionally, there’s an F cabinet, two computers, and a safe to loot. If you manage to fill up your docks case with loot and unfortunately die later, at least you’ll have made some gains. That concludes the exploration of the top floor.
Weapon Testing Area
Alright, heading down to the bottom floor, we’ll start on this side and take a similar route. Right here, you’ll find gold spawns, along with four computers. This room is the weapon testing room, definitely worth getting the key for. It might set you back around 100 or 200k, but it’s worth it. Look on the ground on both sides for LEDX spawns; you’ll find them fairly often. Additionally, there are three weapon boxes and a pimped-out M4 that spawns on the table. Good loot spawns on this table as well.
Moving to the middle section of the map, there’s not much loot to be desired. You’ll mostly find food and drink here, along with computer parts. Keep an eye out for colored key cards that spawn in specific locations, along with stems on top of the tables. Check this spot for computer part spawns. Although LEDX spawns used to be here, they haven’t appeared in ages. Finally, look on the ground for med spawns along this area, and keep an eye out for gold spawns as you move along. That wraps up this section and continue our Tarkov Labs Map Guide.
Black Keycard Room
This is the black key card room, accessible from either side, although most people usually enter from the other side. This is the most valuable key in all of Labs. You can obtain the key from completing the “Colleagues – Part 3” quest, which involves handing over 10 found in-raid Lab access cards, an AF h1m, and 3 btg stems to Therapist. If it wasn’t for this quest, the black key card would be worth a lot more, easily exceeding 100 million rubles in value.
Every time you come to Labs, you can loot this room, and there are stems in here. While there are no stems in offline mode, in online raids, you’ll usually find up to 15 stems in here, along with LEDX spawns and OFZ Scopes. This is incredibly valuable because if you have an empty injector case, you can fill it with these valuable items. Even if you die, you can vendor these stems for over 200,000 rubles, which means looting the black key card room can easily cover the cost of your Labs access card or even provide a profit.
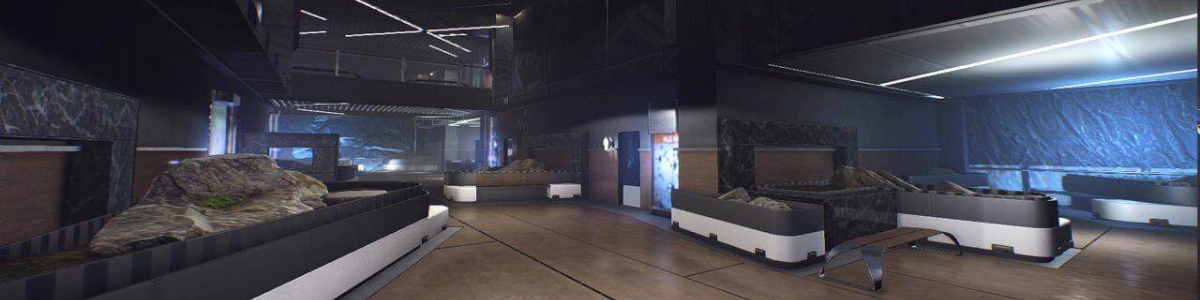
Blue Keycard Room
Alright, heading down this way now. In this section, there are just a couple of Med spawns, nothing too remarkable. This is the blue key card room. We’ll open it in a second, but first, you’ve got the green key card spawn here. Definitely worth checking. Then, there are meds that spawn up on the shelf here. Now, about the blue key card room—it’s probably the most overrated card. You’re looking at stems on there; the only LEDX spawn I’ve seen is in this spot right here. Then, you’re checking the top of all these stretcher beds and rack shelves. There’s not much good loot in here, to be honest.
Running down this back corridor, just be very careful that none of these are bulletproof. If you know someone’s down there, you can spray through these and often get kills. The management office key spawns right there. You’ve got the computers throughout this room and a jacket in the corner. Check all these computers; you’ll definitely find at least one graphics card, if not multiple. Gold spawns right here; you’ll find LEDXes as well. Pretty much everywhere you can find a LEDX is where you find the GPSA and the other item required to upgrade your health.
This back corridor goes around to this section over here, so that’s why I’m not running around there. It’s faster to go this way. You can also go through here, which takes you down to the main elevator. As for the rest of the map, there’s no actual good loot downstairs, but there are some things to show you. Some tips for fighting the Raiders: make sure you don’t overexpose. When you shoot at a Raider, peek out, shoot him, and then do not re-peek immediately. If you’re going to re-peek, wait at least 5 or 10 seconds; otherwise, they’ll instantly kill you. They are very brutal.
Medical Block Elevator Extract
Alright, from the black key card room, head left and run down here. Then, flick this switch, and you’ll activate the medical block elevator. It’s directly below the black key card room, and the switch is right there.
Cargo Elevator
Well, just before the extract we headed to earlier, which was the cargo elevator, the power switch is also located nearby. You can flick this switch here. However, if you activate either the medical elevator or the cargo elevator power, there’s a decent chance that Raiders will spawn. So, be cautious.
If you’re opting for the cargo elevator, it’s the fastest path. Although, be mindful that Raiders might spawn in this area if you activate the power. Once you’ve used the cargo elevator, it’s a one-time use, so keep that in mind.
Main Elevator Extract
Now, we have the medical elevator, located here. Apologies for the confusion. Moving on, this is where you’ll find the red key card room. You run down, flick the power switch situated here, and then proceed to the left. Here, you’ll find the main elevator.
Sewage Conduit Extract
If you’re at the Main elevator and you take a left, running around the back will lead you to the Sewer extract. A helpful way to remember this is if you can spot any of these tunnels, you’re heading down to the Sewer extract. It’s located on the western side of the basement, resembling a square layout. On the northern side are the medical and cargo elevator buttons, while the main elevator is situated on the southern side. Now, proceeding through these gates, you’ll find yourself at the Sewer extract.
This route is particularly useful for completing the guide quest safely. At the start of the raid, you can simply run down to the basement, head straight to the sewer, and wait for approximately seven minutes before extracting. It’s the safest method for exiting Labs without risking confrontation. Wait until around the five-and-a-half-minute mark to flick the lever, giving yourself enough time to extract without drawing unwanted attention.
Moving along the western wall, we circle back to where the staircase for the black key card is located. This completes our path, forming a sort of backward “C” around the bottom section of the map.
Ventilation Shaft Extract
And one more extract we want to show you in our Tarkov Labs Map Guide. This one is particularly useful if you’re following the guide or need to retrieve a quest item like an AF1M or a LEDX. You’ll need to drop your backpack at this vent, as it’s a “no backpack” extract. Once you’ve dropped your backpack, you can extract in 14 seconds.
Even in offline mode, where loot is subpar, we managed to find valuable items without thoroughly checking every spawn point. In online mode, managing inventory space becomes crucial. You can employ tactics like stashing a rig inside your backpack to maximize storage capacity. We hope that our Tarkov Labs Map Guide has been helpful especially for newer players looking to learn the maps.
In conclusion, mastering the Labs map in Escape from Tarkov requires careful navigation, strategic planning, and keen awareness of your surroundings. By following the tips and insights provided in Tarkov Labs Map Guide, you’ll be better equipped to navigate the treacherous corridors, loot efficiently, and secure valuable extracts. Remember to stay vigilant, adapt to changing circumstances, and utilize every resource at your disposal to survive and thrive in this challenging environment. With practice and perseverance, you’ll become a formidable force in Labs, dominating your foes and claiming victory in the intense battles that await. Good luck, and may your raids be prosperous and rewarding!