Tarkov | EFT Factory Map Guide
Welcome to the Factory, Tarkov’s urban battleground. In this Tarkov Factory Map Guide, we’ll explore its tight corridors and intense firefights, providing essential tips for survival. From loot spawns to extraction points, we’ll equip you with the knowledge needed to navigate this dangerous terrain. Get ready to face the challenges and opportunities that await in Tarkov’s most notorious map.


Tarkov Factory Map Guide
Today, we’re diving into our Tarkov Factory Map Guide. We’ll cover everything from extraction points to spawn locations, key trouble areas, valuable loot, and strategies for taking down the notorious boss, Glukhar. But before we jump into the details, let me emphasize why Factory is such a crucial map for new players. It offers a perfect environment for honing your PvP skills and familiarizing yourself with Tarkov’s intense gameplay. With a maximum of six players per session, including yourself, it provides a manageable setting to learn the ropes and sharpen your survival instincts. Let’s get started!
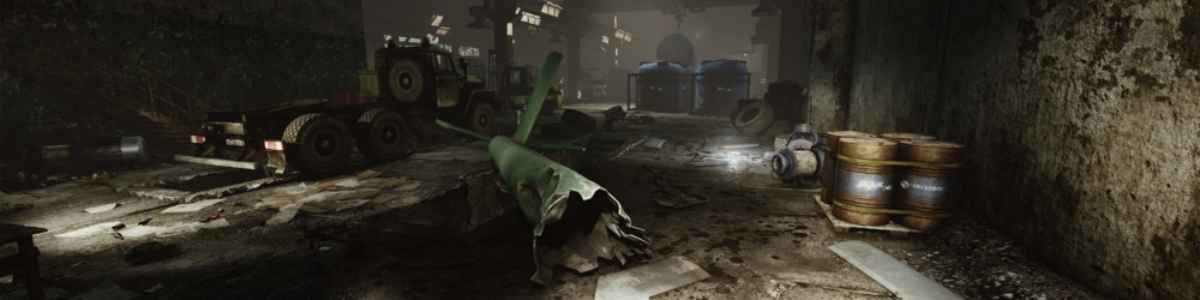
Forklift
Alright, this is the forklift spawn, and it’s one of the few spawn points on this map. However, it’s also one of the trickiest spawns you’ll encounter. If you find yourself here, the key is to not linger in this room. Seriously, don’t do it. Many players make the mistake of staying here and end up getting caught and killed.
Immediate Action Plan
So, what should you do? Immediately upon spawning, run straight out, take a left turn, and keep moving. Pay close attention to the hallway as you run. If anything looks out of place, like a player hiding behind objects, proceed with caution. This area is a hotspot for enemy players, and you need to be vigilant.
Keep your ears open for sounds indicating other players’ presence. There are multiple spawn points nearby, including the glass hallway and outside areas. If you spot someone in the glass hallway, here’s a pro tip: go prone, hold Alt, and tap D to peek out slightly. It’s a simple move but can score you easy kills. Mastering this tactic can make all the difference, especially in this high-traffic area of Factory.
Strategic Considerations
If you happen to spawn in the glass hallway, exercise caution. Running down this corridor is a surefire way to attract attention and, likely, meet a swift demise. Savvy opponents will position themselves to take advantage of your exposed position, making it a dangerous route to take.
Instead of risking a direct confrontation in the glass hallway, consider alternative approaches. Exiting through the nearby doorways or navigating to the office area can offer better cover and strategic advantages.
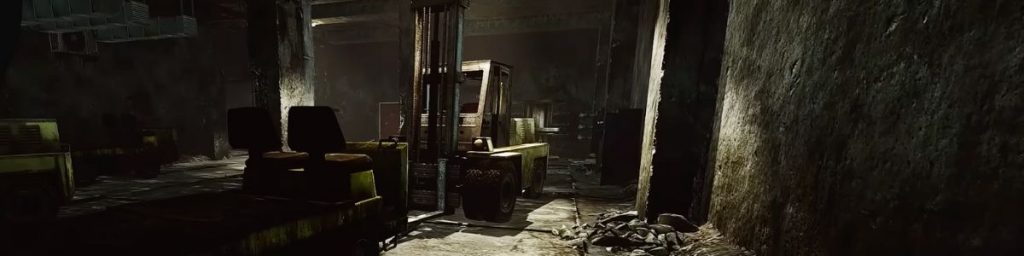
Navigating the Forklift Area
The forklift area is undoubtedly one of the most chaotic spots on the map. Spawn points abound, and players quickly converge here for intense firefights. Understanding the layout and potential threats is crucial for survival.
Keep in mind that certain areas, such as the locked door requiring the factory key, offer tactical advantages. Accessing this door can provide opportunities for ambushes or intercepting escaping players.
Discovering advantageous positions, like the one overlooking the extraction door, can turn the tide of battle in your favor. Knowing where to position yourself for maximum visibility and cover is key to securing kills and surviving engagements.
Strategies for Long-range Engagement
For players equipped with long-range scopes, exploiting the glass hallway’s length can yield strategic advantages. Using cover and precise aiming, you can pick off unsuspecting foes from a distance, turning their ambush attempts into fatal mistakes.
In Factory, every move counts, and understanding the map’s dynamics is essential for survival. By leveraging strategic positioning, tactical awareness, and keen marksmanship, you can emerge victorious in the intense battles that define this compact and lethal environment.
The Main Extract
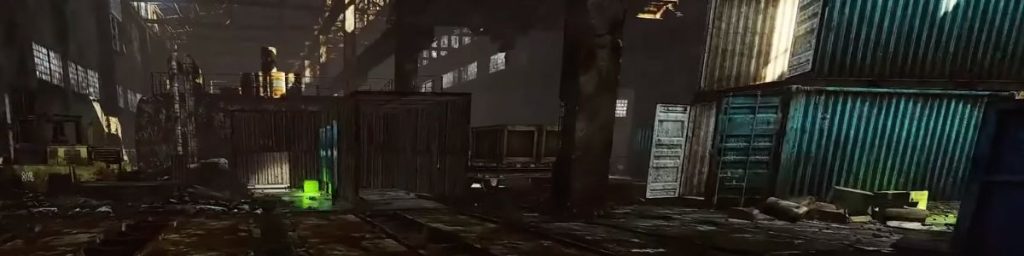
The next location of our Tarkov Factory Map Guide is the main extract. Alright, this is the primary extract on this side. Let’s focus on avoiding potential campers at this main extract. Often, players will position themselves behind the blue shipping container or nearby. So, how do you spot them? A quick run across the area, though it requires practice, can reveal their presence. By familiarizing yourself with the surroundings, you’ll quickly discern any hidden threats. Additionally, consider utilizing elevated positions or shooting through gaps to catch campers off guard.
Be wary of players camping in this area, particularly in prone positions. If you suspect someone is camping, don’t hesitate to apply pressure by firing a few shots near their position. This tactic often forces campers to relocate, giving you an advantage. Remember, it’s not about cheating; it’s about adapting to the challenging environment of Factory. Stay vigilant, especially if you haven’t encountered many players during the raid.
Exploring Beyond the Primary Extraction Point
So, this is the primary extraction point, and it’s the only one on the map that doesn’t require a key. Now, let’s continue our Tarkov Factory Map Guide and explore the rest of the map. Returning to our starting point, we’ll navigate the perimeter of the map for a comprehensive overview.
Here, we’re at the forklift area, which includes the new expansion zone. While my previous guide may not have covered this, it’s crucial to understand its layout. Keep in mind that exploring in offline mode can provide valuable insights into the map’s layout. Moving on, there’s a medical supply crate and a chance for a med bag in this area, along with scattered meds on the ground. Another notable feature is a factory key extraction point nearby.
Below, you’ll find a weapon box and a grenade box, essential for scav runs, particularly if you’re hunting for impact nades. Additionally, keep an eye out for the technical supply crate, although loot opportunities are relatively sparse in Factory. One frustrating spawn location to watch out for is here, where players often camp. Avoid lingering in this area to minimize the risk of being picked off. Instead, consider your options carefully, whether it’s pushing out if geared or adopting a cautious approach if spawning here.
Strategic Maneuvers and Spawn Awareness
At this angle, you’ll often encounter players spawning on the opposite side of the map. If they stop here to engage you, take advantage of the cover to retaliate. However, if you opt to head towards the forklift area, watch out for potential spawns there. Alternatively, if you’re aiming to avoid combat, you can sprint straight out.
For those looting the office or seeking to evade immediate PvP engagements, utilizing the staircase into the office or jumping into the pit can be strategic maneuvers. In this area, known as the single player spawn, spawns have evolved over time. Be cautious of potential spawns in the corner near the key extraction point, and be prepared to defend yourself accordingly. It’s advisable to swiftly move past this area, minimizing the risk of encountering players from that section.
Tactical Considerations in Office Area Engagement
Another critical point – avoid approaching players from the left side if you know they’re positioned below. Experienced players will anticipate your move and target your feet as you expose yourself, potentially causing leg injuries and inducing panic. It’s wise to refrain from engaging from this angle. Additionally, beneath this area, you’ll find several weapon crates, making it a significant scav extraction point.
Moving on, let’s briefly explore the underground section. There’s a tunnel leading left and up a ramp, as well as another path to the left, both connecting to the single player area. This spot serves as a common scav extraction point. Transitioning to the office area, you can use any callout you prefer, but we’ve always referred to this spot as “Church” due to its window resembling a church window. Utilizing callouts is beneficial for effective communication, such as “86” based on the year displayed on the wall, aiding in location identification. As for the office area, it’s advisable to avoid exposing yourself by peeking recklessly.
Office

Okay, avoid peeking like this—it’s a surefire way to get yourself killed if your opponent knows what they’re doing. Instead, here’s the approach: move to this end, crouch, and simply lean out like so. You’d be surprised how many times someone unsuspectingly pops their head up, and just like that, they’re out of the game. So, be cautious about peeking down this hallway like that. If you must peek, we’d suggest a wider angle rather than sticking your head out like that.
Handling Doors
Now, let’s talk about doors. These two doors lead to the main office area. Inside, you’ll find filing cabinets, two jackets, and a safe. It’s quite amusing how many people camp in there with the doors shut tight. My strategy? Well, there are a few ways to handle it. One option is to open the first door, then the second, do a quick sprint, and enter ready to shoot. It often catches campers off guard, unsure of which direction you’ll come from. If you suspect someone’s inside but don’t want to risk entering, here’s a neat trick: stand in the breach room, aim through the gap, and toss a grenade. It might just net you a few grenade kills.
Room Defense Strategy
When you’re inside the room, here’s my strategy for holding it from within. Now, the audio might be a bit off, so be cautious. We prefer to leave both doors open and aim in this direction. You’ll catch their legs as they come in, then finish them off as they emerge on the other side. The moment you hit their legs, especially if they’re on painkillers, they’ll start panicking. Sometimes, even after being shot in the leg, they’ll keep walking in, exposing themselves for an easy headshot. It’s the most effective way to control the room. Just watch out for anyone approaching from the other side. If you hear footsteps, sprint across to this side and catch them off guard. By the time you reach here, they’ll likely be focused on the open door, making them an easy target from the side.
Favorite Map and Key Usage
Factory is our go-to map—it’s our favorite for PvP action. Plus, it’s where the factory key comes in handy. This door here requires the factory key and inside, you’ll find a jacket and occasionally a key spawn on the ground. However, it’s quite rare and not worth relying on. The rest of the room isn’t particularly valuable, so save your factory key uses for more promising spots.
Bathroom Tactical Spots
Heading down here, we come to the bathroom. The main point of interest here is the ability to drop down to the bottom floor. You’ll find some toolboxes, a duffel bag, and a couple more jackets in this room.
Be cautious of someone hiding behind this door—it’s not uncommon to encounter. Another thing to note in the bathroom is that if you’re aware of someone passing through, you can take them out from this angle too. We’ve got a few tactics for playing in the bathroom. You can stand on top of this spot and catch them off guard as they come through the doorway. They won’t expect you up here, but you’ll still have a clear shot. There are plenty of cheeky spots like this that we want to teach you. For example, if someone’s coming up the hallway, you can shoot at them, close the door, retreat, and keep shooting—this tactic works surprisingly well.
Pumping Station Awareness
Moving on to the pumping station, there are keys for it, but the loot isn’t worth the trouble. Just be cautious as the doors do open. There are a couple of lootable spots on top of that. That pretty much covers everything, except for how to deal with the boss. Generally, try to stick to the edges of the map unless you’re feeling confident. Running through the middle leaves you vulnerable from multiple angles, especially after around the 12-minute mark when players and Scavs become more aggressive. Lastly, as soon as you hit level 15 and can afford it, always bring a factory key with you to this map.
Avoiding the Main Extract
Currently, they’re priced at around 880,000 roubles. Earlier, they were rarer, but regardless, it’s best to avoid using the main extract if possible. The factory key, priced at 880,000 rubles, covers about 20 extracts. It’s around 4K to extract from any other point, so it’s a wise investment to use alternative extracts. Many players camp the main extract, often armed with impact grenades, making it nearly impossible to confront them directly. Sometimes, they come in groups, increasing the odds against you. Even with experience, clearing it properly often requires an abundance of grenades. Without them, it can be challenging.
Farming Tagilla
When it comes to farming Tagilla, my tactic is straightforward. However, in offline mode, it doesn’t quite behave as expected. Despite several attempts, it tends to run around aimlessly instead of following the usual pattern. Nonetheless, the strategy involves shooting Tagilla a few times until he retreats to heal. As he does, find cover and wait for him to begin healing. Then, resume firing to take him down quickly. His armor no longer covers his entire thorax, so targeting the stomach area is effective. With practice, it becomes relatively easy.
In conclusion, mastering the Factory map in Escape from Tarkov requires a blend of map knowledge, strategic awareness, and adaptability. By familiarizing yourself with the key extraction points, understanding potential camper locations, and honing your combat tactics, you can navigate this intense and unforgiving environment with confidence. With patience, perseverance, and the insights gained from this guide, you’ll be well-equipped to tackle the challenges of Factory and emerge victorious in the ruthless world of Escape from Tarkov. Thanks for reading our Tarkov Factory Map Guide. Good luck, and may your raids be fruitful!